


- Click the Spam Controls link on the lower right side of your inbox screen.
- When the Mail & Spam Controls box appears, click the Custom Sender list link.
- Choose the Allow email from … (Sender) option.
- Then click Add.
- Click Save.
Email Whitelisting
Never Miss an Email
When it comes to email it is a never ending struggle to keep out the spam and let in what you want. A lot of times that means if you don’t tell your email app what you want it will block as much as it can.
This means that you might miss an important email from us just because your email app doesn’t know you like our emails!
Ok so how do you fix that so you never miss and email? You need a white list…
So what is a whitelist and why do I need to whitelist you? Think of a whitelist like a guest list at a restaurant. If your not on the list chances are you aren’t getting in… Your email works much the same way. When an email comes in and the email program isn’t sure if it is spam or not it checks to see if the sender is on the whitelist. If they are then it puts the email into your inbox if not it foes to spam.
alright so now that you know why you would want to whitelist PAX lets talk about how you actually go about doing it…
 Apple Mail
- Open an email that you have received from us
- Click on the star the left of our name in the To section of the email.
- Click on our name and in the dropdown that appear select the “Add to Contacts”
Optional Extra Steps
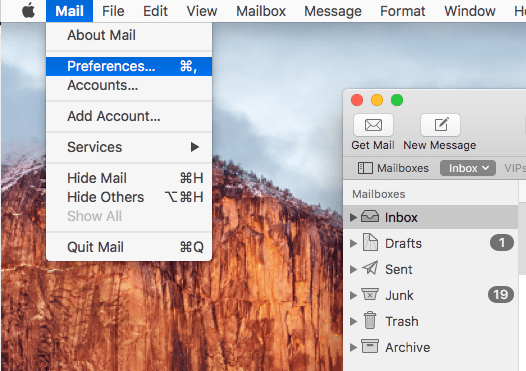
- Click on “Mail” in the top menu bar and then select “Preferences”
- Click on the Junk Mail Icon and ensure “Sender of message is in my Contacts” is checked
- Close this windows. ( There is no save button and you won’t be prompted to save, but don’t worry your changes will be saved automatically)
Outlook 2003 & Later
For Outlook.com
- Click the gear in top right hand corner of the screen by your name and avatar.
- In the drop down that appear click “More email settings” ( you may need to select “mail” under more app settings if you don’t see “More email settings” in this drop down)
- Clock “Safe and blocked senders” this my also show up as under “Accounts” as “Block or Allow”
- Add the domain “@PAXTraining.com” under “Safe Senders and Recipients”
For Most Desktop Versions Of Outlook
- Open an email that you have received from us
- Right-click on our name and in the dropdown that appear select the “Add Sender to Safe Senders List” or “Never Block Sender” depending on your outlook version
Outlook 2010
- Click the Home tab.
- Click Junk.
- Click Junk E-mail Options.
- Click Safe Senders.
- Click Add.
- Enter [wlemail] and additional information if you wish.
- Click OK to finish.
Outlook 2007
- Right-click on the email you received (in the list of emails).
- Click Junk E-mail.
- Click Add Sender to Safe Senders List to finish.
Microsoft Outlook 2003
- Open the email message from the sender you want to add to your address book.
- Right-click Click here to download images in the gray bar at the top of the message.
- Click Add Sender to Senders Safe List to finish.
Windows Live Hotmail
- Open an email from the sender that you want to whitelist.
- Click Add to contacts next to [wlemail] to finish.
Thunderbird
To create an auto whitelist so that email addresses do not go to Junk:
- Add our email to your address book as a contact
- Under Tools > Account Settings go to Junk Settings
- Now make sure you select “enable adaptive junk mail controls for this account”
- Under “do not automatically mark mail as junk if the sender is in :” make sure you select address book
- Select ‘Move new junk messages to’
- If pop select: Junk fodler on mail account name
- If IMAP select ‘Other’ and Junk / spam fodler on imap mail account.
- Click on OK to save changes.
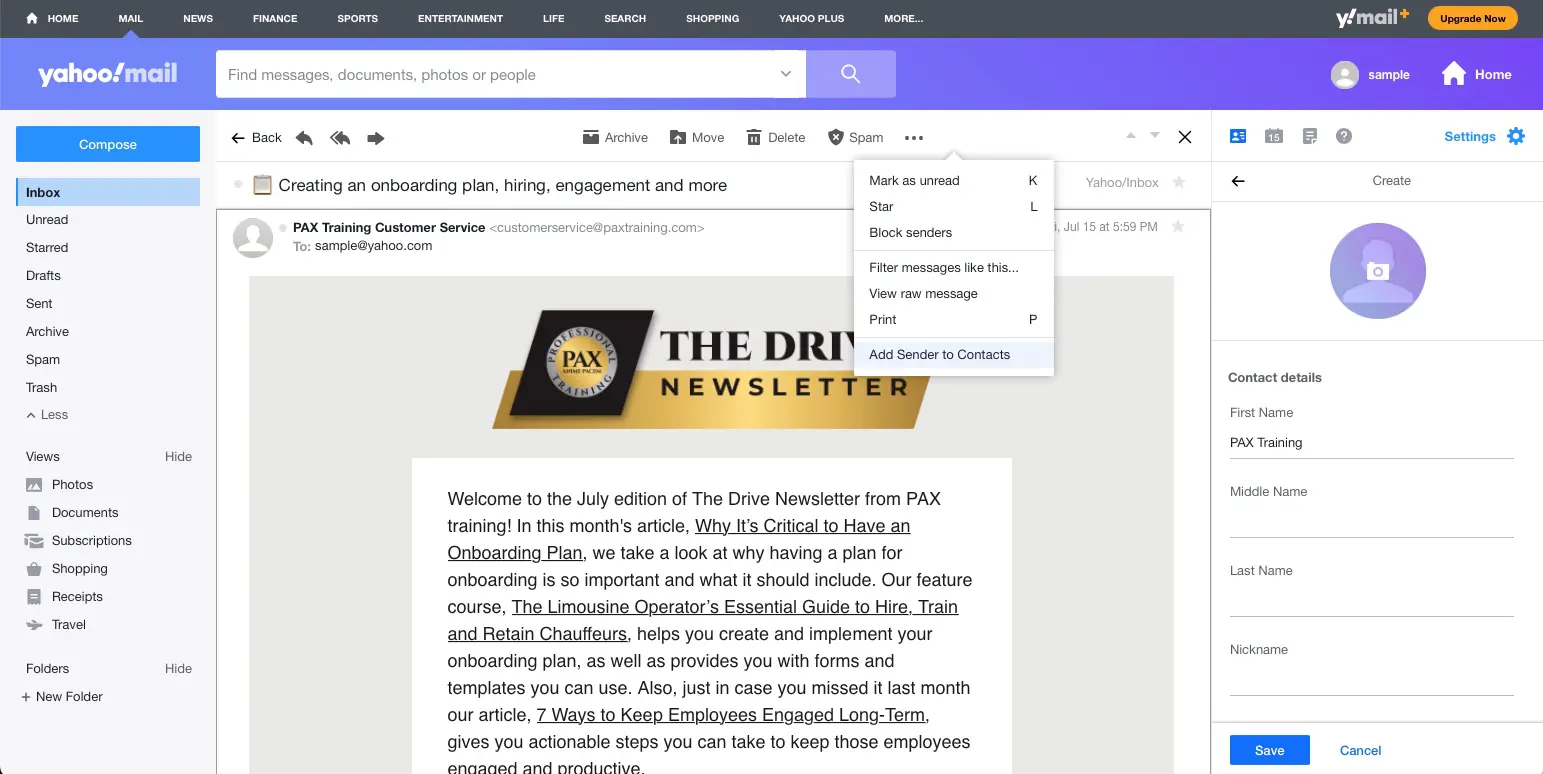
Yahoo Mail
When opening an email message, you should see three dots at the center right above the message. Clicking these will drop down a menu. In this menu click “Add Sender to Contacts”. In the create contact section that appears on the right enter “PAX Training” as the first name and click “Save”.
America Online Mail
To make sure email gets delivered to your AOL inbox, you must add the email address or corporate domain of the sender to your Address Book or Custom Sender List.
Android
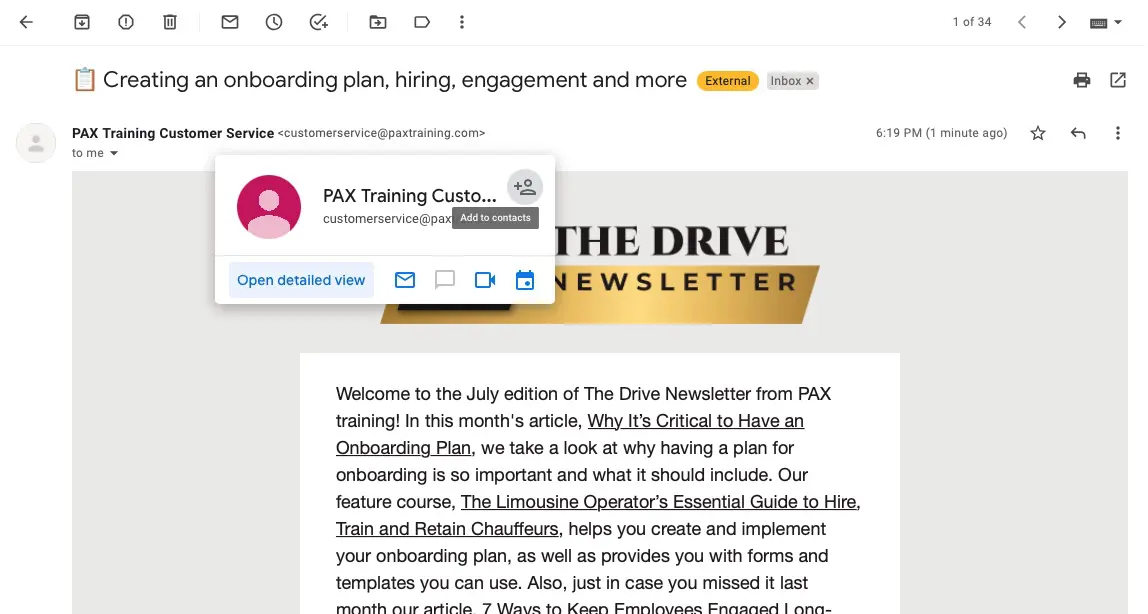
Open the email in your Gmail app.
- Tap the contact icon to the left of the sender’s name and email address.
- Tap “Ok” on the “Add contact” pop-up box.
- Tap on “Create new contact” at the top of your Contacts list.
- Enter the sender’s name in the “First name” field.
- Enter the sender’s email address in the “Email” field.
- Tap “Save” to save the address.